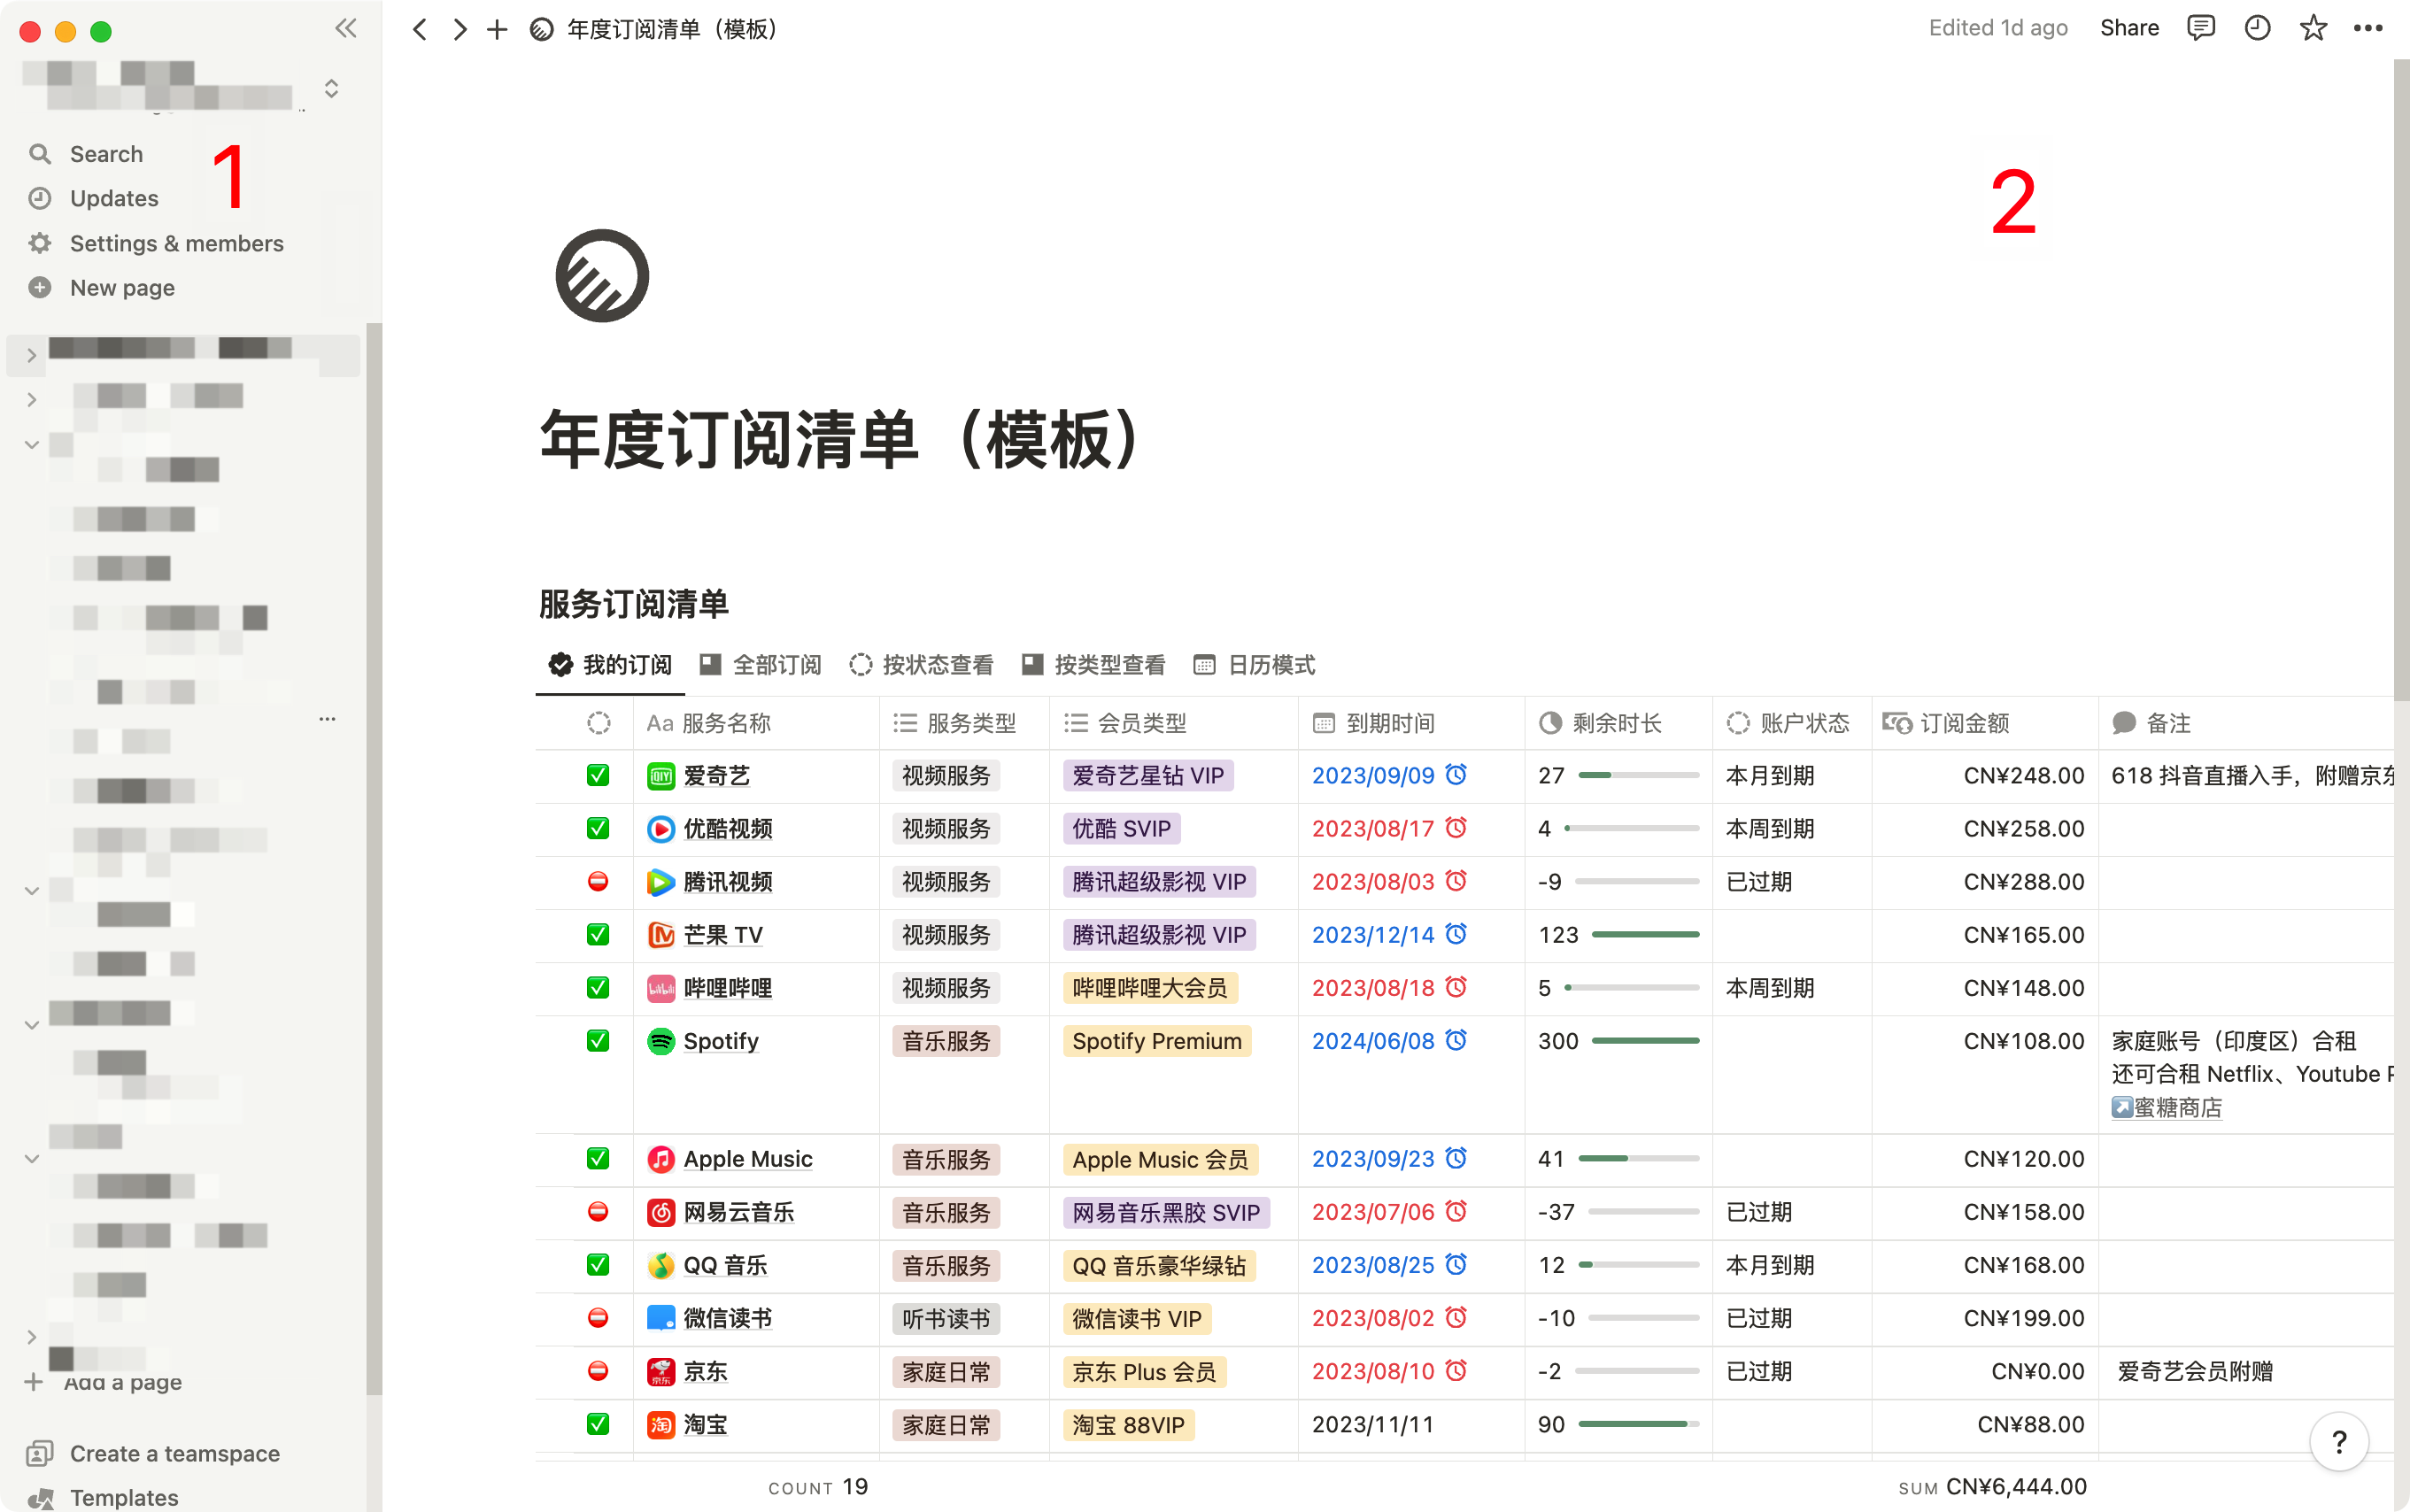
- Sidebar The expandable sidebar in Notion serves as your navigation system. All the pages and databases you create will be displayed here. Pages can be nested within each other for infinite organizational hierarchy. The sidebar also contains your settings, trash bin, and other tool options. Here’s a brief overview of the sidebar.
- Editor All the content you create resides in this editor. The control menu is located at the top (which we’ll delve into in more detail). Apart from this, Notion’s editor is a blank canvas for you to write, plan, brainstorm, and more. You’ll notice that once you start typing in this space, the top menu fades into the background, allowing you to focus on your content.
Sidebar Tools
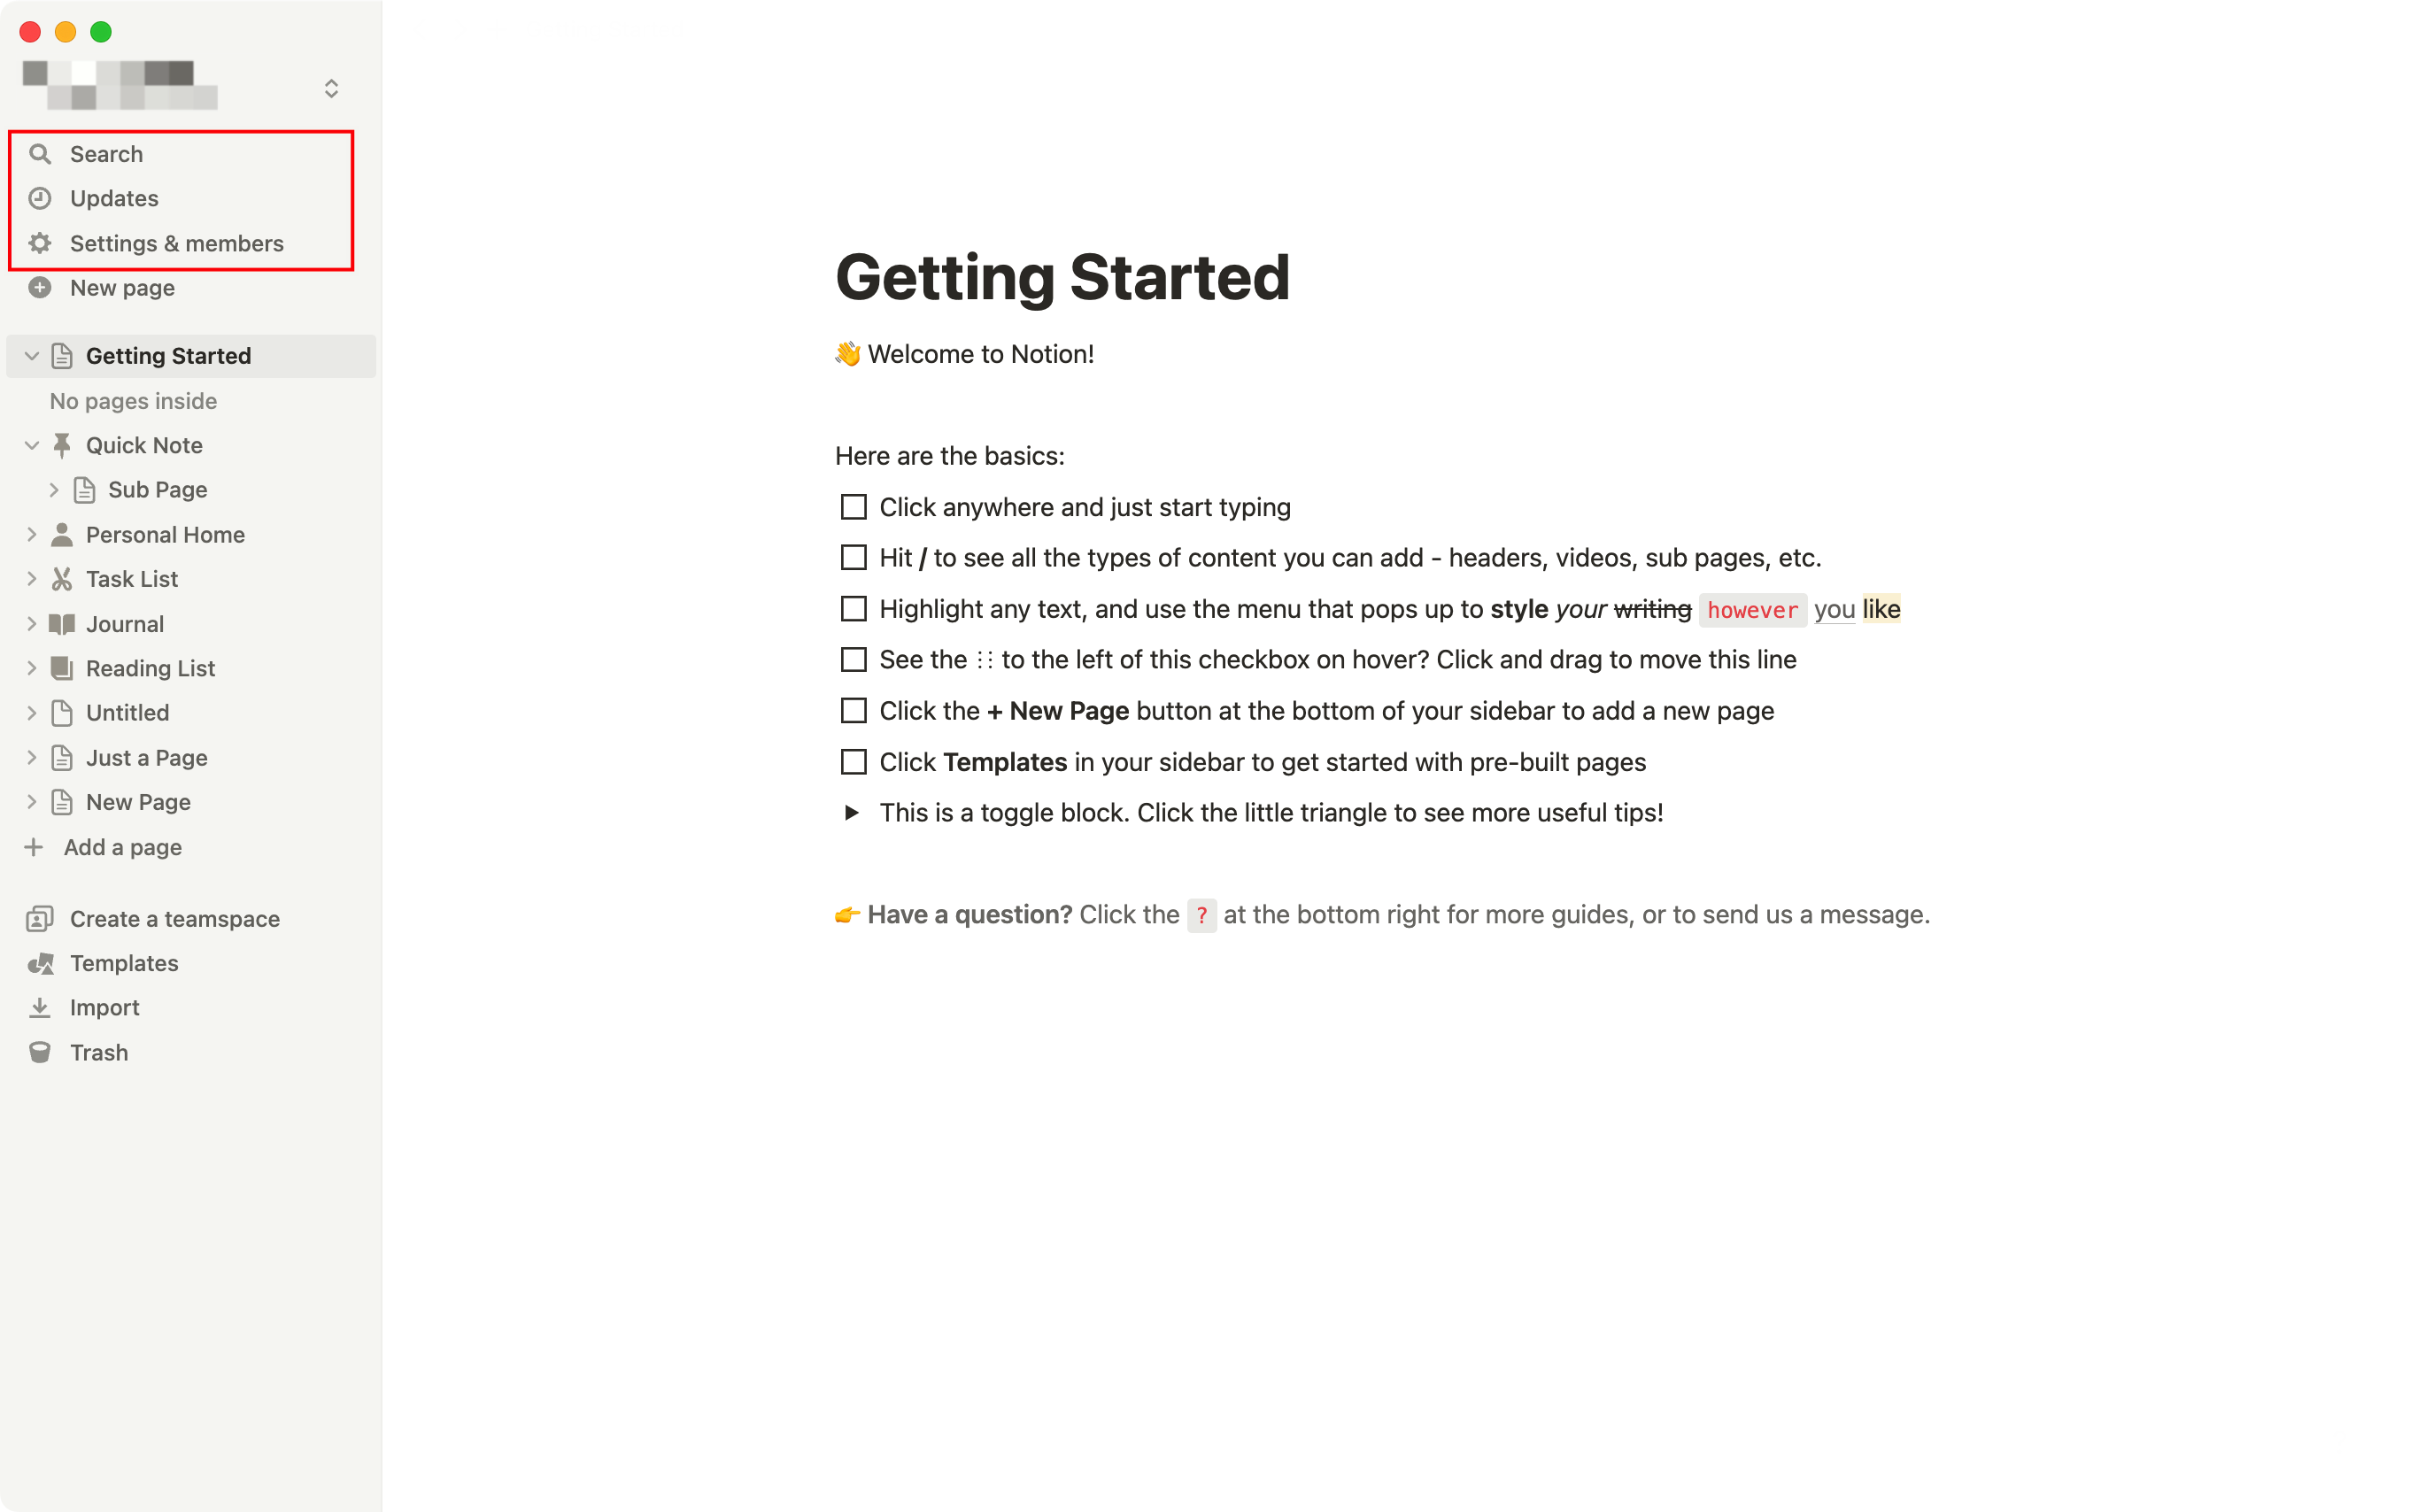
- Control Panel: Located at the top of the sidebar, it has several main functions:
-
-
- Workspace Switching: Click on the current workspace name to switch between all your workspaces. You can also create a new workspace, join another one, or log out.
- Quick Search: Click to open Notion’s search window. You can type in what you’re looking for or quickly jump to recently visited pages.
- All Updates: Click to view all notifications. This menu combines revisions on pages you’ve subscribed to, mentions of you across the entire workspace, and new task assignments. A red notification badge appears when you have unread notifications.
- Settings and Members: Click to access your account information, workspace, payment plan, and billing details.
-
- Workspace: Any page under “Workspace” in the sidebar can be viewed and shared by other members of the workspace. This section of the sidebar can be edited by other team members, and you’ll always see the same navigation (including any changes you make). If you’re using the free or personal version of Notion, you won’t see this workspace section unless you invite at least one other person. All your pages are private by default.
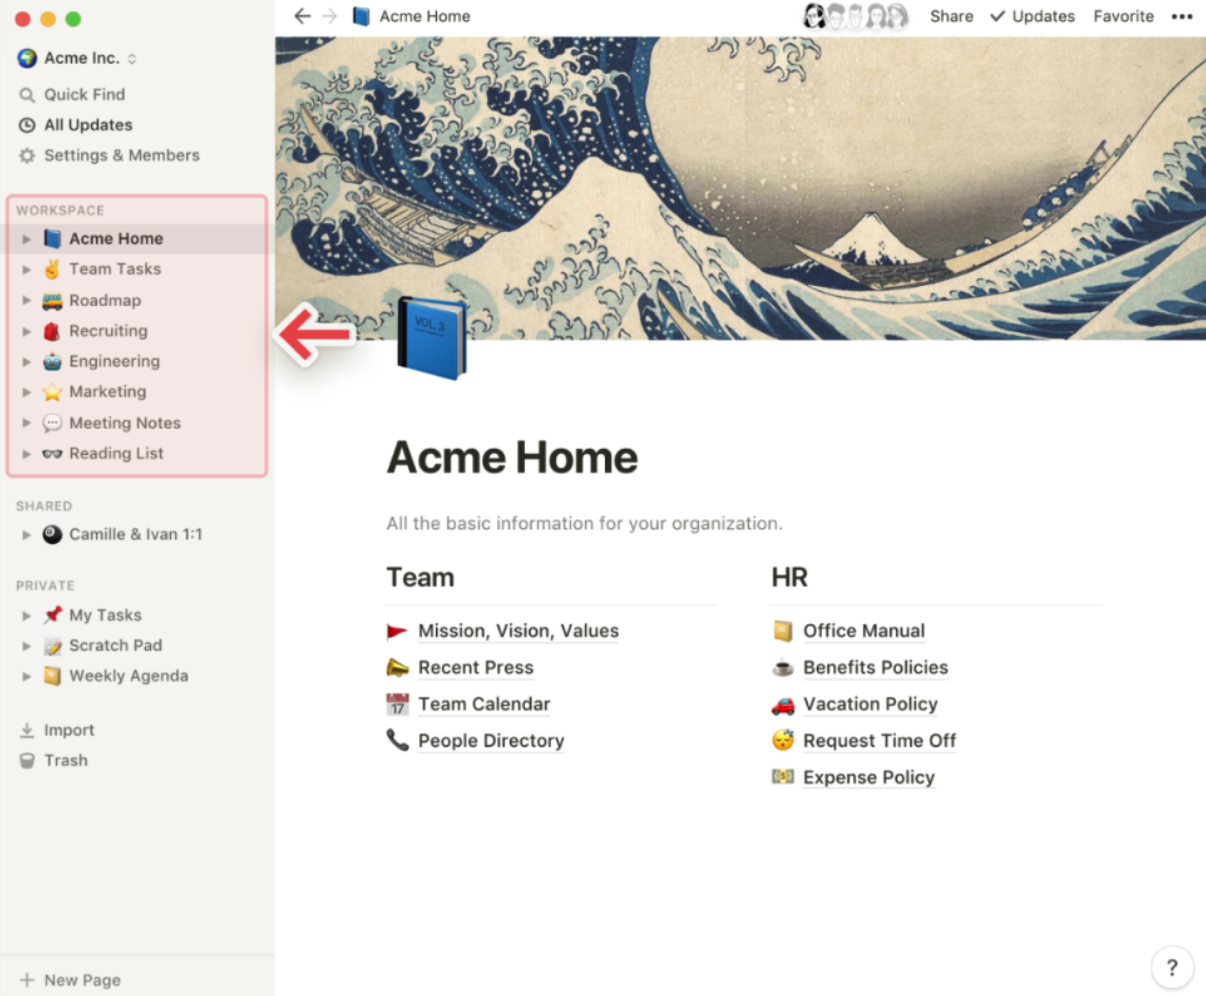
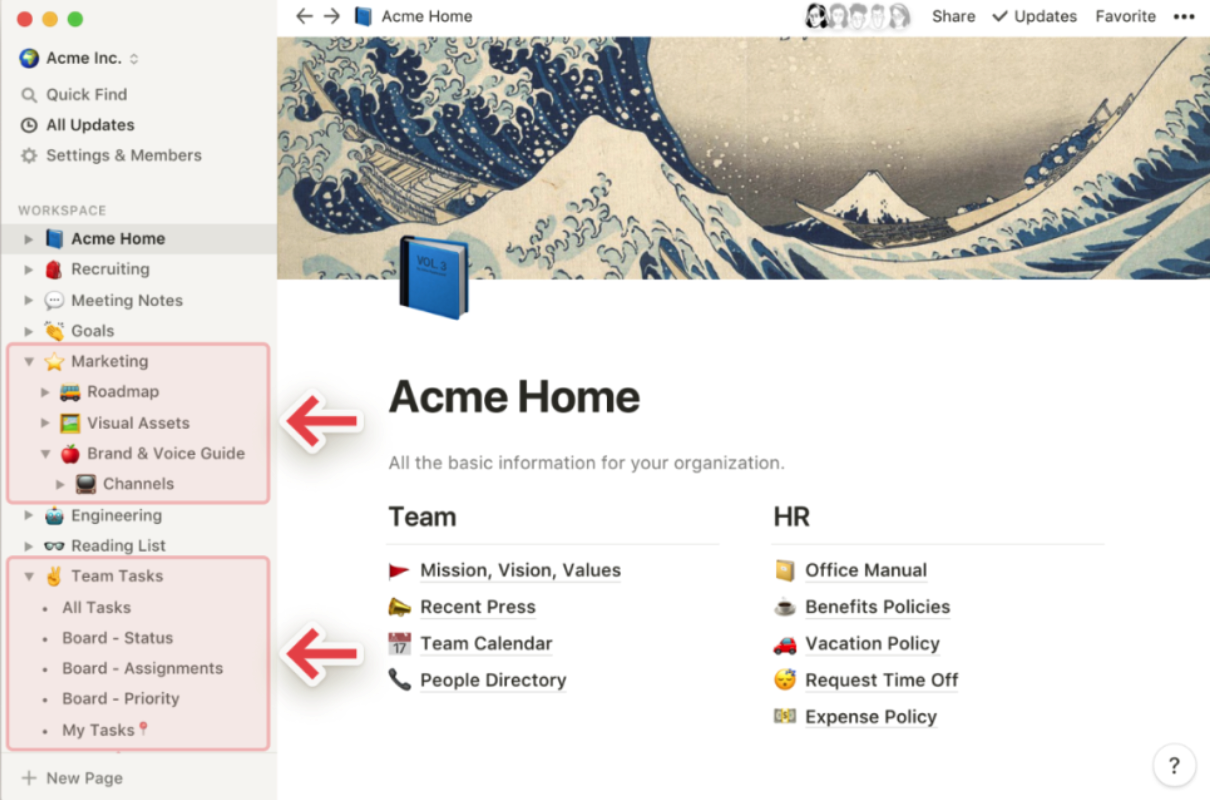
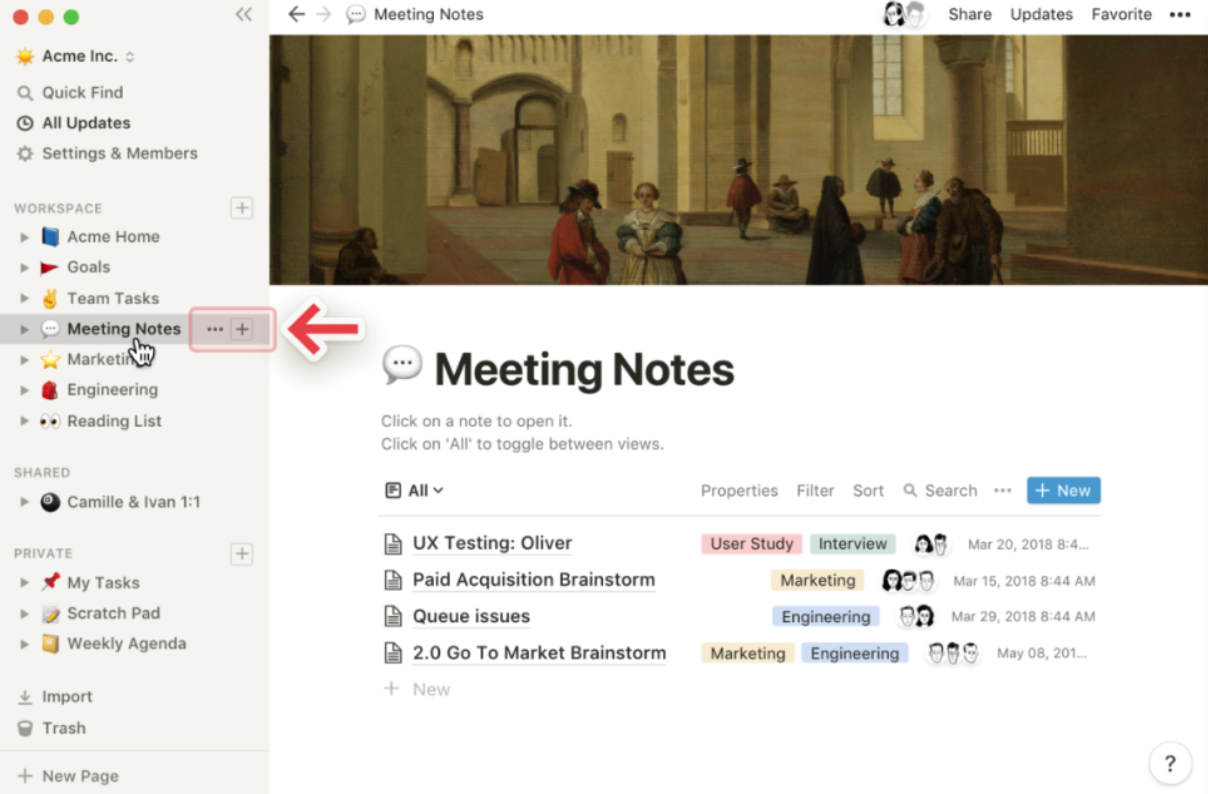
- Nested Pages: You can expand any sidebar toggle to display pages nested within a page. We often refer to nested pages as subpages. For database pages, you can expand the toggle to see all the different views you’ve created for that database. They’re indicated by a dot, as shown under “Team Tasks” in the image above.
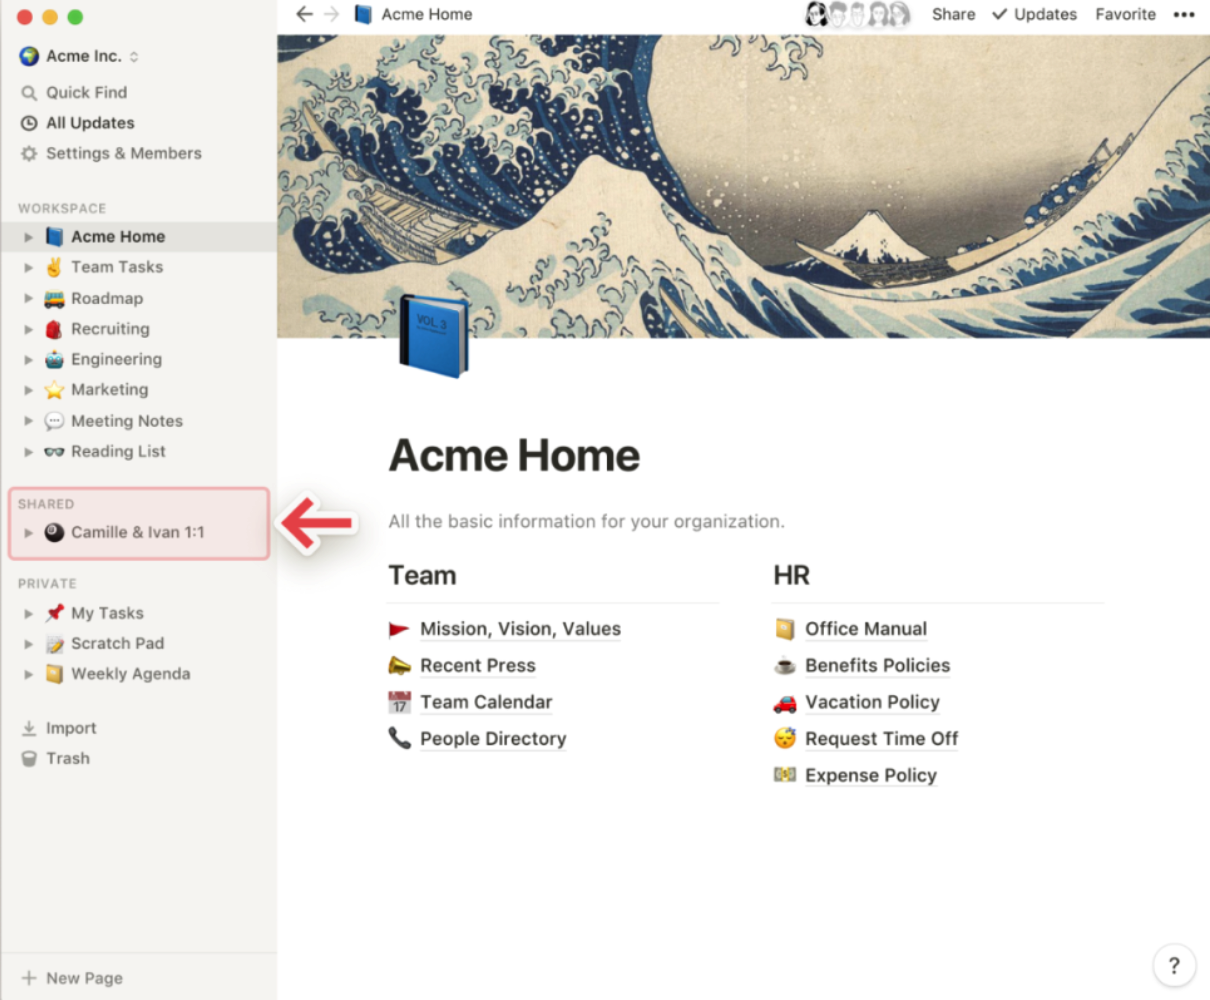
- Shared Pages: Any page you share with selected individual users will appear under the “Shared” category. You’ll see this category in the sidebar once you invite someone to a private page. Other members in your workspace who haven’t been invited can’t view these pages. For instance, this is useful for one-on-one meeting notes. To remove a page from “Shared” without deleting it, hover over the page, click on the three dots, and then click “Leave.”
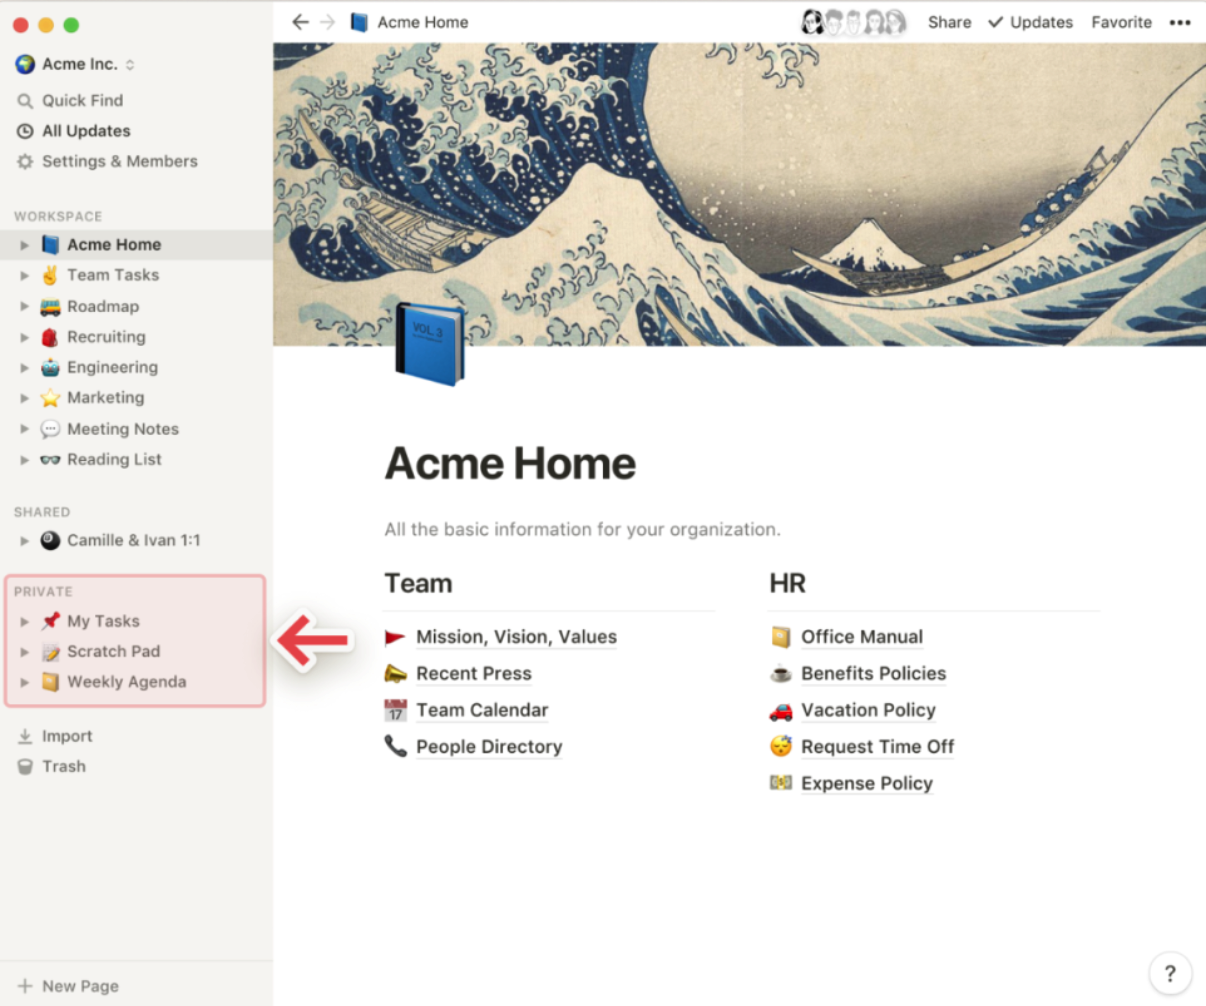
- Private Pages: We provide a “Private” section for every user’s workspace. Any content added here won’t be seen by other members in the workspace. This is useful for saving your own tasks or notes, or any work you want to do on your own before sharing with others. Note: If you drag a page from “Workspace” to “Private” in the sidebar, others won’t be able to access it.
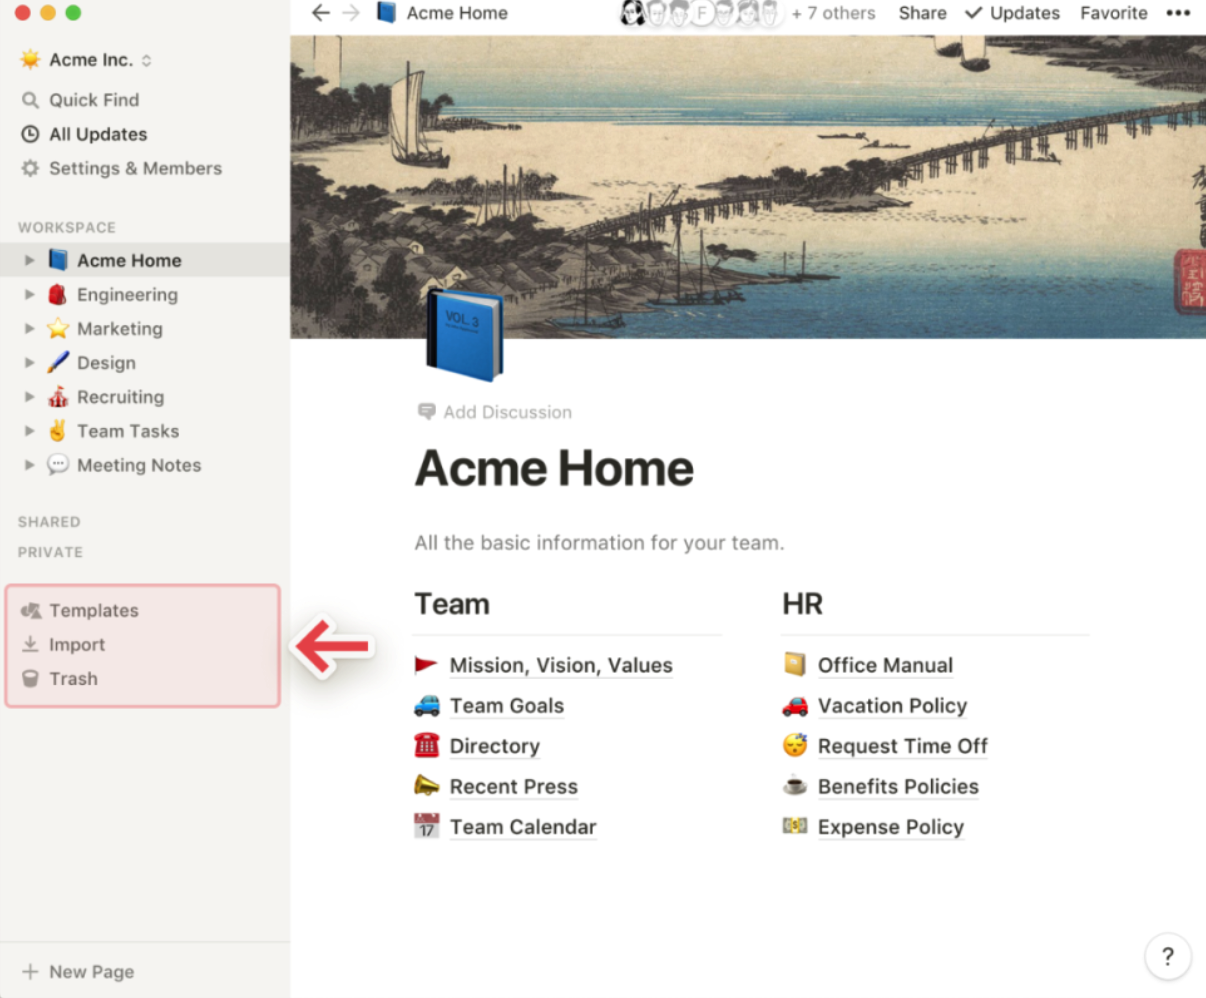
- Templates, Import, and Trash:
- Templates (New Feature!): Open our new template selector. You can use starter content templates to help you create over 50 types of pages.
- Import: This feature helps you add data from many other apps into your Notion workspace. You can easily import content from Evernote, Trello, Asana, Word, Google Docs, Dropbox Paper, Quip, and more.
- Trash: Contains all your deleted pages. You can drag them here. You can also click on the trash bin to search, view, and restore these pages.
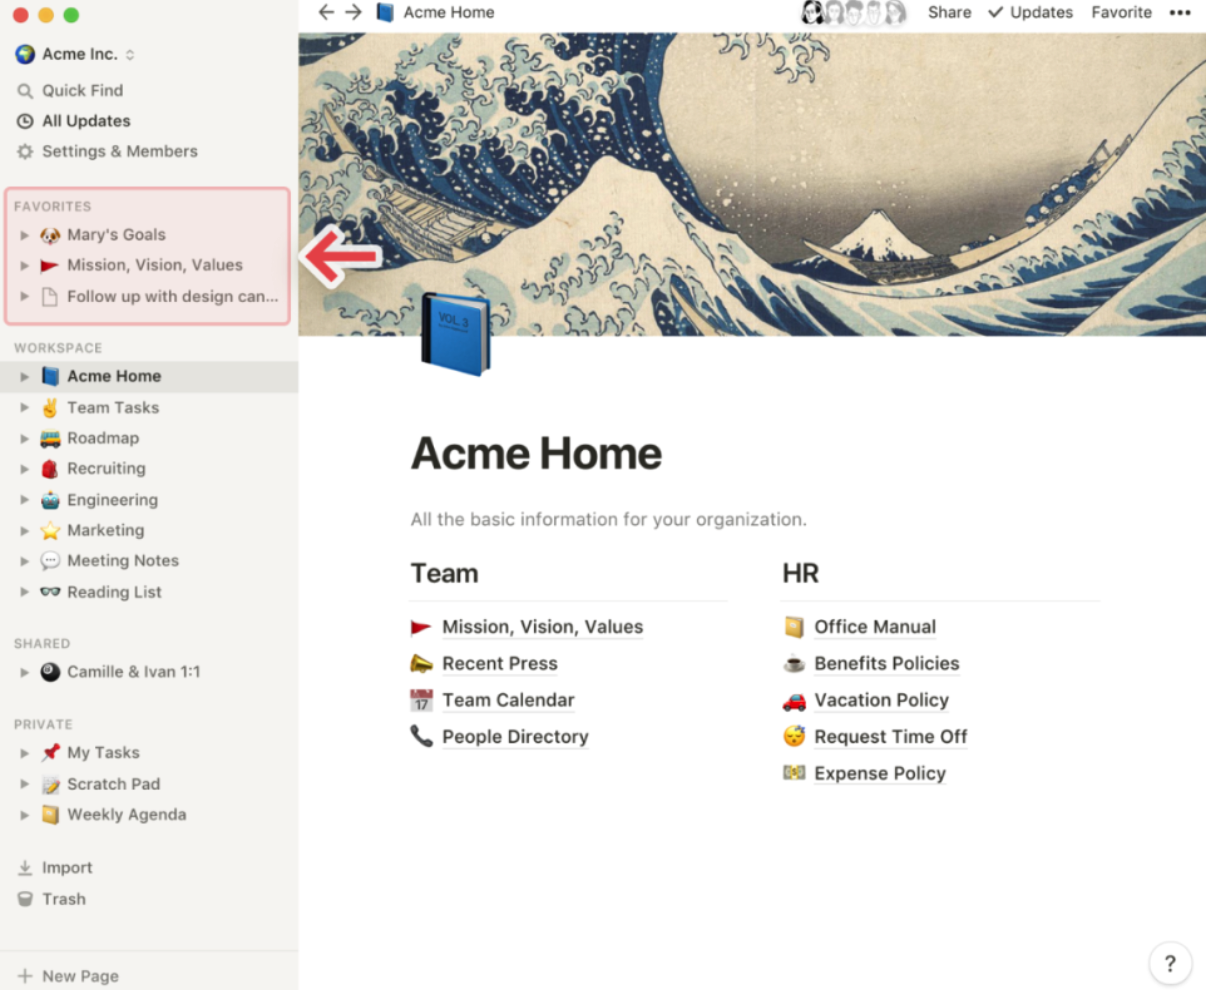
- Favorites: “Favorites” allows you to pin pages you need quick access to at the top of the sidebar. This section appears once you favorite your first page (by clicking the “Favorite” button on any page you visit). It’s helpful for placing pages related to current projects. You can easily add or remove them as your workflow and priorities change.
- Creating a New Page: Click the “+ New Page” button at the sidebar to create a new page. Or, when hovering over a section in the sidebar, click the appearing “+” button to create a new page.
- Hover Options: When hovering over a page in the sidebar, you’ll see a “+” button to create a nested page and a “•••” icon to open various page actions, including: Delete, Duplicate, Copy Link, Rename, and Move To. The “Move To” option opens a dropdown menu, allowing you to move the page to any other workspace or page.
Editor Tools

- Breadcrumb Navigation: Always know where you stand in the page hierarchy. See how the page you’re currently viewing relates to other pages. You can click on any page in this breadcrumb to instantly jump to it. Sometimes, there’s an ellipsis symbol here—click it to view or navigate to all the pages in between.
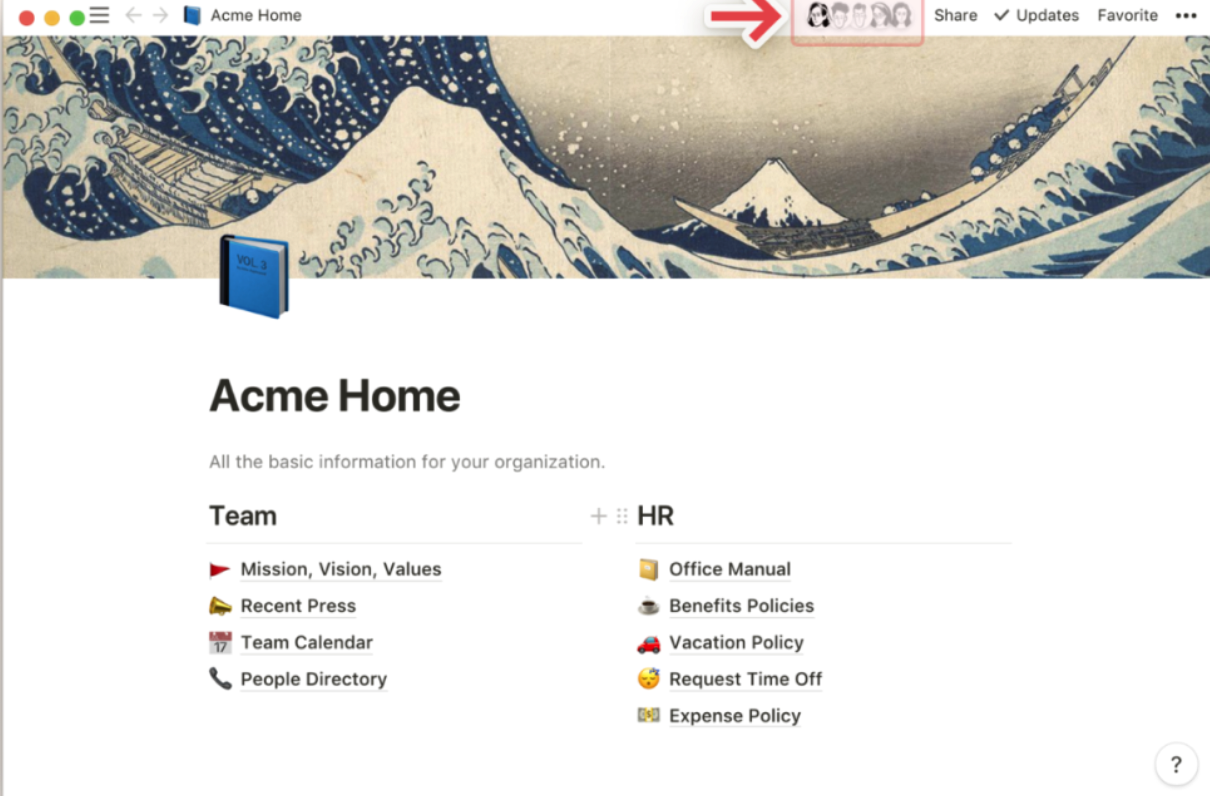
- Collaborators: You can see avatars of everyone else who has access to the current page (sometimes simplified to symbols like “+16 others”). Hovering over any of them shows a full list, including names and email addresses. Grayed-out avatars represent people who haven’t viewed the page yet but have access. When collaborating in real-time, you’ll see people’s avatars move with the blocks they’re reading or editing.
- Share Menu: Through this menu, you can share the current page in various ways.
-
-
- Public Access: Enabling this makes your page public on the web. Anyone with the link can access it. All links remain clickable, making it ideal for building public resumes, portfolios, blogs, simple websites, etc.
- Workspace Access: Once enabled, everyone in your workspace can view the page. You can set access levels like full access, edit only, comment only, or read-only.
- Your Access: By default, you have “full access” to pages you create, but you can remove your own access if needed.
- Groups: You might also see groups created in your workspace, and you can assign different access levels to them.
- Invite a Person: Allows you to invite another Notion user, whether they’re part of your workspace or not, to view the page. If they’re not part of the workspace, they’ll join as a guest.
- Copy Page Link: Makes the page easy to share. This link is only accessible to those with permission based on your other settings.
-
- Update Menu: Click on “Updates” to view a summary of all revisions and comments on the current page.
-
- Follow This Page: Enable this to keep tabs on changes made to the page. You’ll see a summary of updates for all subscribed pages in the “All Updates” menu in the sidebar.
- Connect Slack Channel: Receive notifications in a chosen Slack channel every time there’s a new revision or comment on the page.
-
- Favorites: Click “Favorite” to pin the page in the “Favorites” section of the sidebar. This is very helpful for quickly accessing pages you frequently visit for a project. To unfavorite a page, hover over it in the sidebar, right-click (or click “•••”), and choose “Remove from Favorites.”
- ••• Menu: This menu contains many editing and action options:
-
- Style: Choose a style for the current page from three available layout formats.
- Small Text: Enable this to reduce the font size across the entire page.
- Full Width: Enable to reduce the page’s left and right margins.
- Page Lock: Enable to prevent editing. This helps avoid accidental edits on crucial pages.
- Database Lock: When enabled for a database, people can still input data but can’t change database views or properties.
- Add to Favorites: Pin the page to the top of the left sidebar.
- Copy Link: Copy the link to the page for easy sharing with those who have access.
- Page History: View the page’s history for the past 30 days (only available in the paid version).
- Show Deleted Pages: Open the “Trash” to recover or permanently delete deleted subpages.
- Import: Add documents and data from many other apps (Evernote, Trello, Google Docs, etc.) to the page.
- Export: Download the page as a file to your computer. Databases are saved as CSV files, while non-database pages are saved as Markdown files. You can also export pages or databases as PDF or HTML.
- Move To: This opens a menu where you can move the current page to any other workspace or page.
- Word Count: Count the words on any page for reference.
- Last Edited: See who last made changes on the page and when.
-
- Help & Support: Click the “?” icon at the bottom right corner to open the “Help & Support” options.
- Chat with Us: Send a message directly to our support team from the app.
- Guides and FAQs: We’ll direct you to the “Help & Support” center you’re currently reading.
- Shortcuts: Quickly view all keyboard shortcuts and Markdown commands.
- New Features: Release notes for features we’ve launched and previews of upcoming features.
Team vs. Personal Workspaces:
A reminder that the workflow for workspaces differs slightly between team and personal use:
- By default, personal workspaces keep pages private unless explicitly shared.
- In teams, any page under “Workspace” in the sidebar can be viewed, and it’s likely that all members of the workspace can edit it (unless otherwise specified).
- All members can view the sidebar organization under “Workspace.” Everyone sees the same page layout, but team members switching between different open or closed pages won’t affect others.
- If you’re using the free version of Notion, you can invite as many members as you want to the workspace and assign them different access levels.
- In the team or enterprise version of Notion, member and admin permission levels differ.