Get ready to dive into the world of Notion databases! These powerhouses of organization have three standout features:
- High customization: You can add properties of any data type.
- Independent pages: Each data entry is a standalone Notion page, allowing you to add more information.
- Multi-dimensional views: You can browse the database through multiple views.
Let’s get started and see these features in action!
1. Creating a Table
Start by adding a new page, then select ‘Table’. Note that the first column is for entering your data entries. Each column in the table corresponds to a specific attribute of the current entry. Define different attributes (like date, person, etc.), and you can add specific contextual content for each entry. Click on ‘Properties’ in the top right corner of the table, and you’ll see all available properties in the dropdown menu under ‘Property Type’. Here’s a quick rundown of some properties:
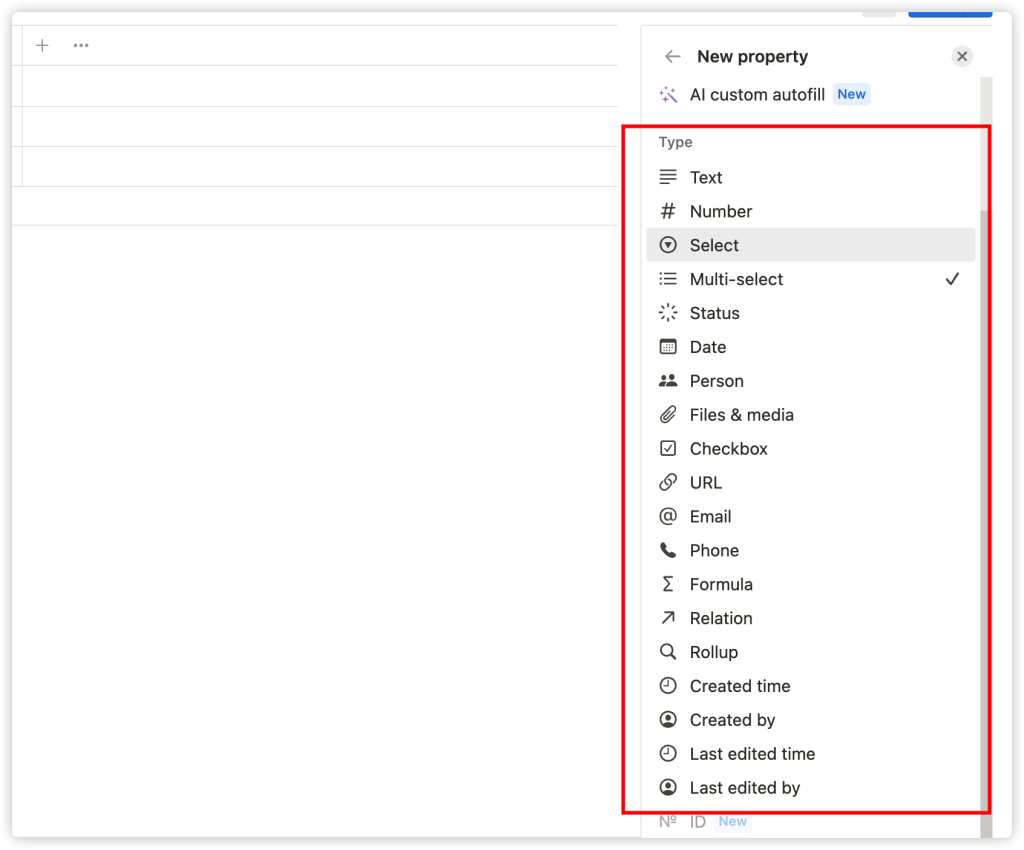
- Multi-select: This property lets you create and add multiple tags.
- Date: Allows you to add dates related to the entry, like deadlines, event dates, etc.
- Person: Lets you insert team members, such as a member assigned a task.
- Files & Media: Allows you to upload files, images, and other media.
- Checkbox: Lets you mark whether certain things for the entry have been completed.
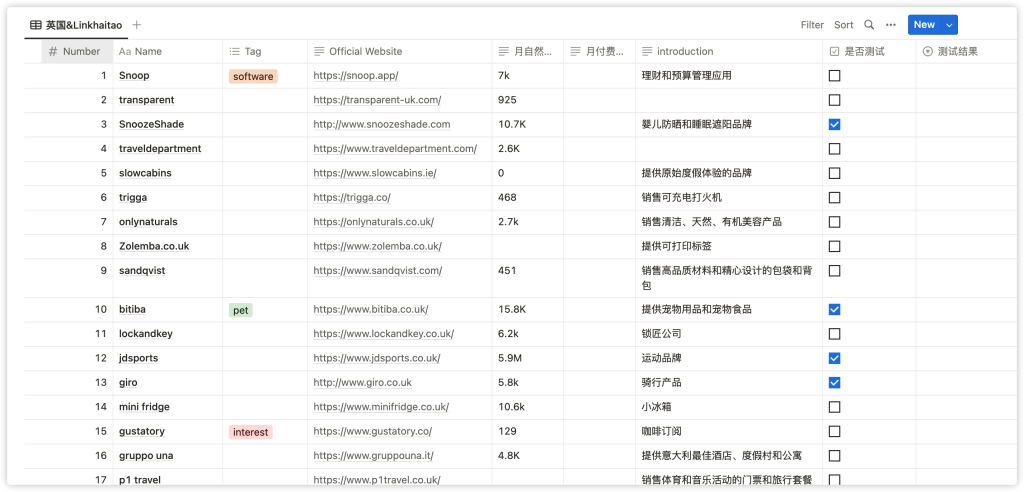
Here’s what a database with a variety of different properties looks like:
2. Adding Data to Your Table
In this example, we’ll create a ‘Task Database’. Start by adding some project names you’re working on in the ‘Name’ column.
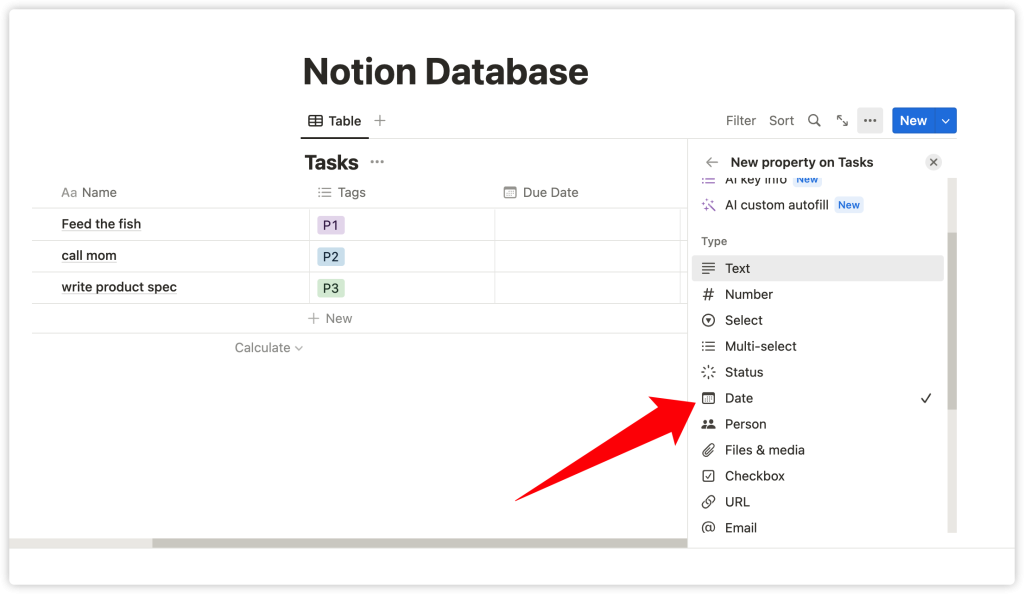
Then, use the ‘Tags’ column (which uses the Multi-select property) to add some tags, like P1, P2, and P3, to indicate task priority. Let’s rename the column named ‘File’. Click on this column name to modify the property name and type.
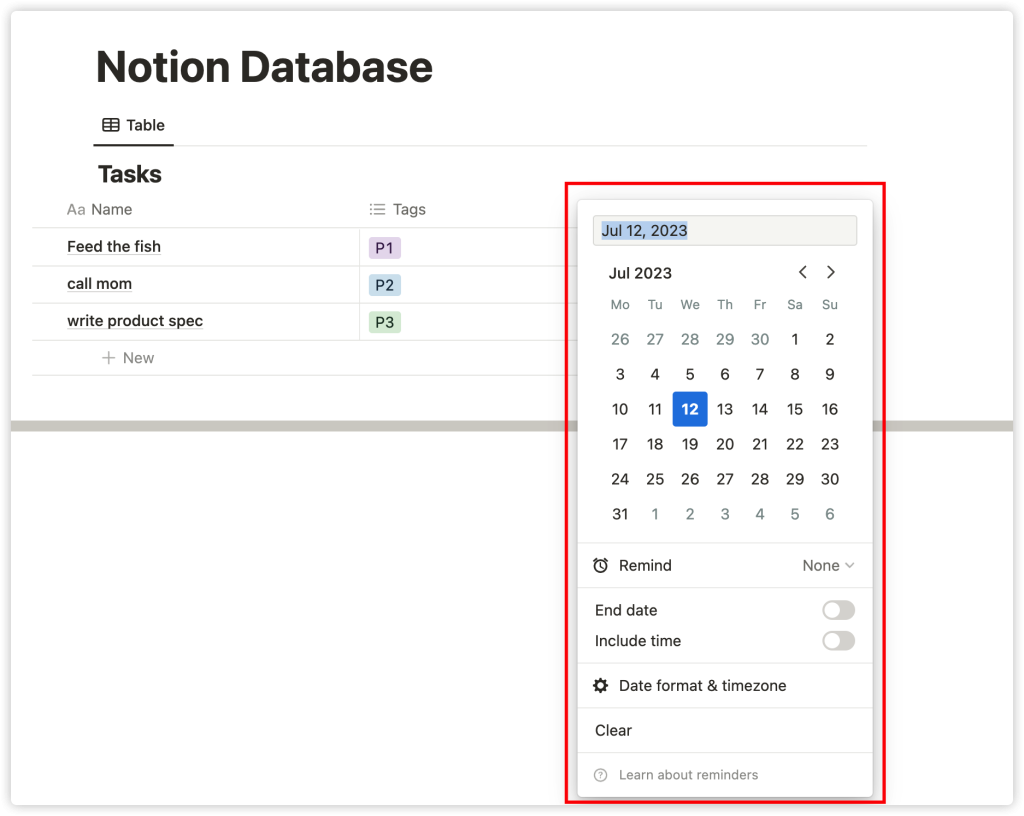
Change its name to ‘Due Date’, and select the ‘Date’ property from the dropdown menu under ‘Property Type’. Now you can click on the cells under the ‘Due Date’ column, and a date picker will pop up.
Each property type has a series of different options. For example, the ‘Files & Media’ property will prompt a file upload window, and the ‘Person’ property will present a list of team members to choose from.
3. Opening a Row as a Page
Each entry in a Notion database is a full page in itself! On this page, you can add any content, including other databases.
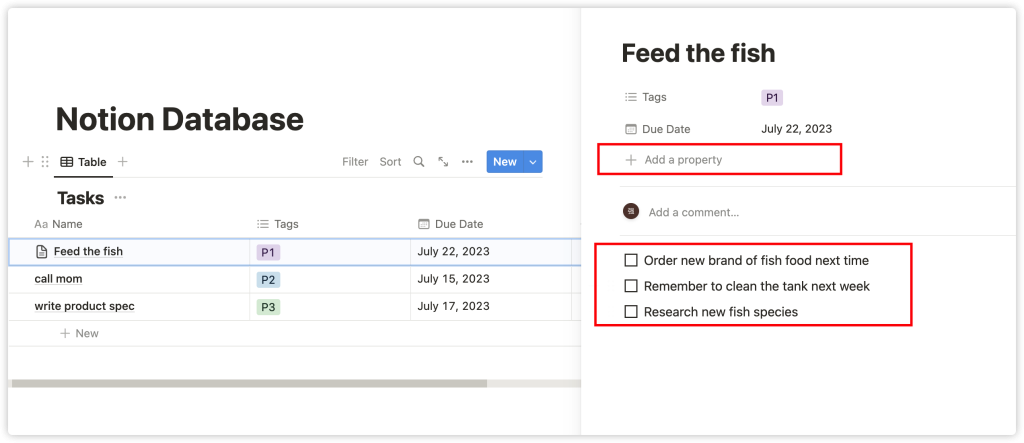
In our ‘Task Database’ example, you can neatly place related notes and content in the nested page of the corresponding task. To open a row as a page, hover your mouse over the cell in the first column and click on the ‘OPEN’ button that appears. A window like the one below will pop up:
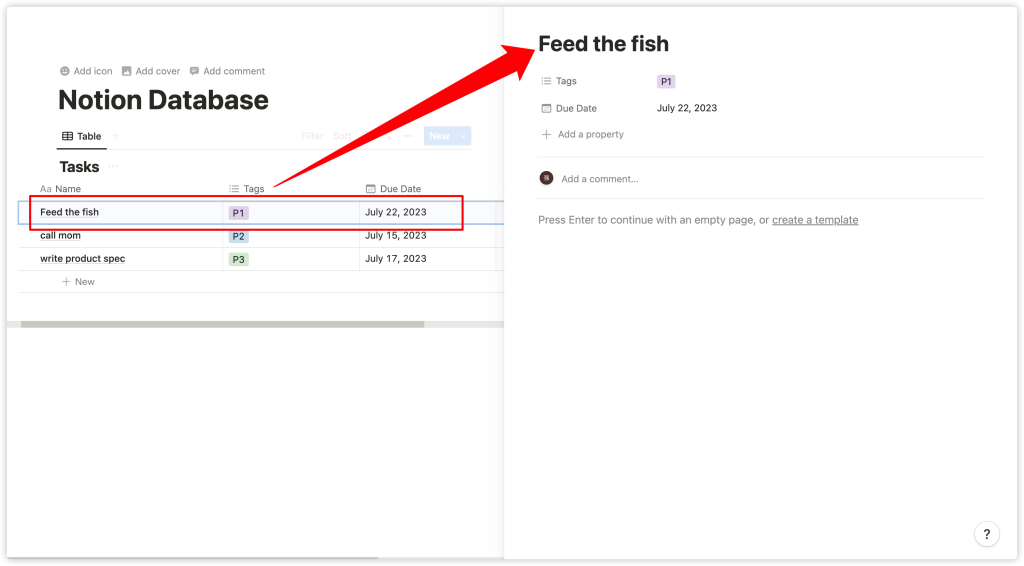
Here, you can add or edit any property. You can also add any content in the main body of the page.
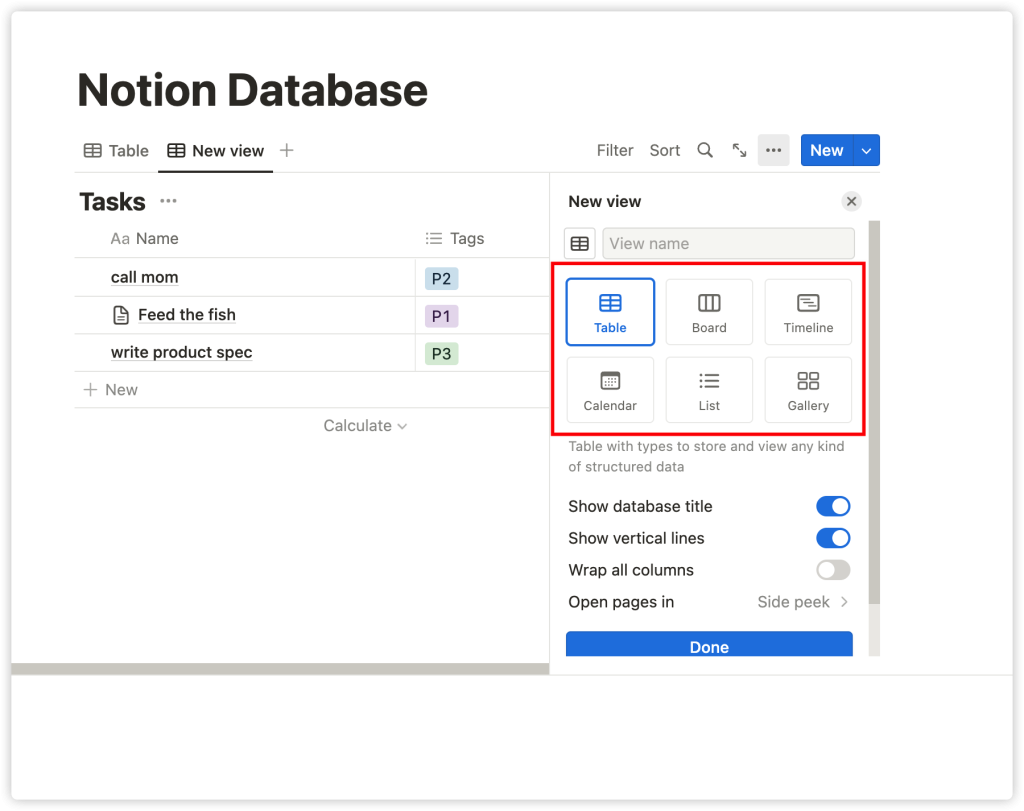
4. Creating a View
You can create different views for the same set of data. Depending on your needs, you can create a Board, Calendar, List, or Gallery view for your database. Let’s give it a try.
Click on ‘+ Add a View’ in the top left corner of the table.
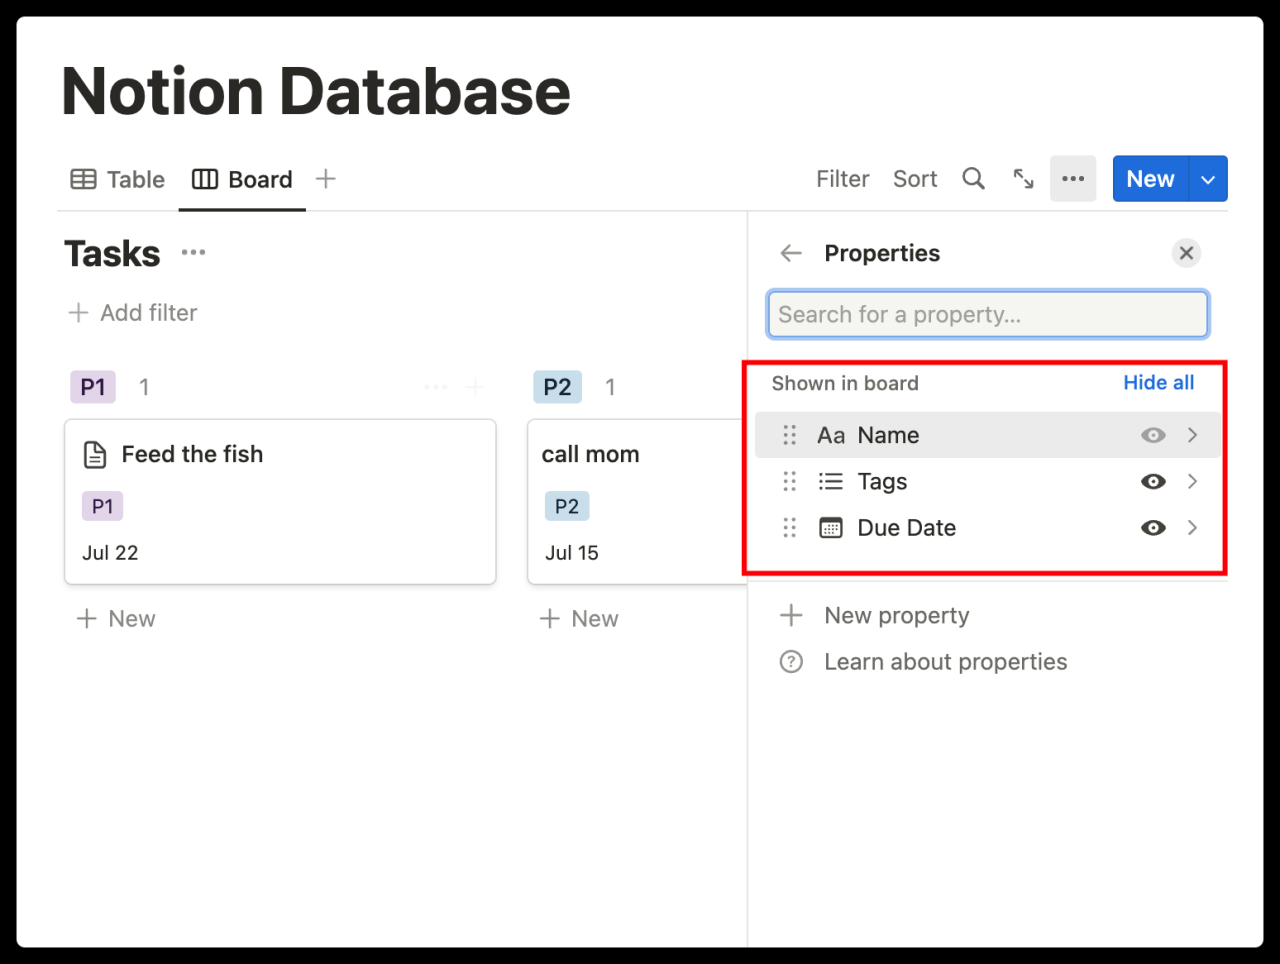
Then, name your view and select ‘Board’ from the dropdown menu. This operation will convert each row in the table into a card in the board, grouped by tags. Clicking on a card will still open it as a page. Notion offers several ways to customize your board:
- Click on the ‘•••’ icon next to the title to hide or edit any column.
- Click on the ‘+’ icon next to the title or the ‘+ New’ button below to create new cards.
- Drag the title to rearrange.
- Click on ‘Properties’ in the top right corner to switch the properties you want to display on the card (or add new properties).
- Click on ‘Group By’ in the top right corner to choose other properties for grouping.
Now, let’s turn the Board into a Calendar, so we can easily see the due dates of various tasks. Click on the name of the current view to switch to other views you’ve created, or add new views. The calendar allows you to browse what’s happening, when projects are due, etc.
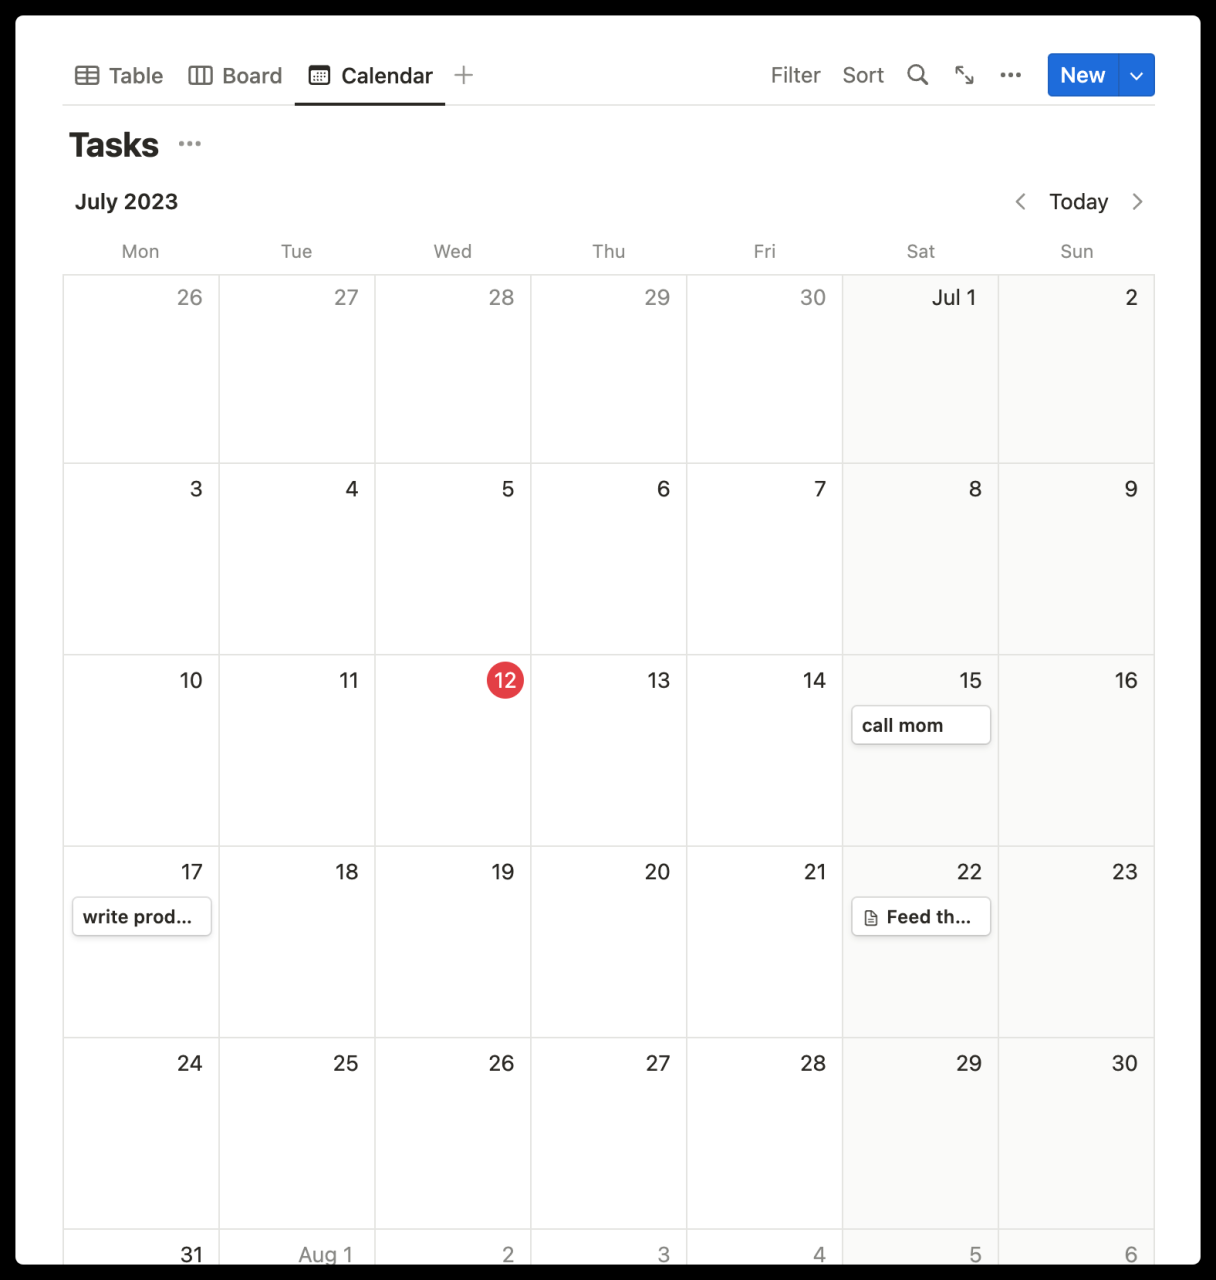
Information on the dates you select will be displayed on cards. Click on any card to open it as a page. Click on the ‘Properties’ menu to switch the properties you want to display on the card.
Different views are suitable for different use cases: The Gallery view is perfect for image-based databases. The List helps with minimalist document storage.
5. Filtering Data
We can filter properties to focus on specific content in the database. Let’s go back to the table view. Click on ‘Filter’ in the top right corner of the table, then click on ‘+ Add a Filter’.
Choose any property you want to filter, and set the filter condition. Note that the options in the middle dropdown menu are determined by the corresponding property, and different properties have different options.
In our example, let’s choose ‘Tags’ as the filter property and set it to ‘Must Contain P2’. You’ll notice that your database will change in real time based on your filter conditions. You can add multiple filters.
To turn off a filter, go back to the ‘Filter’ menu and click on the ‘X’ icon next to the corresponding filter. You can follow the steps below to create different views with different filters:
- Add and name a new view.
- Select this view and filter the data as you wish.
- Switching between different views allows you to experience the filtered content from different perspectives!
For example, you can only see tasks assigned to you, or only see tasks with P1 priority, or only see tasks in a particular project with specific tags.
6. Sorting Data
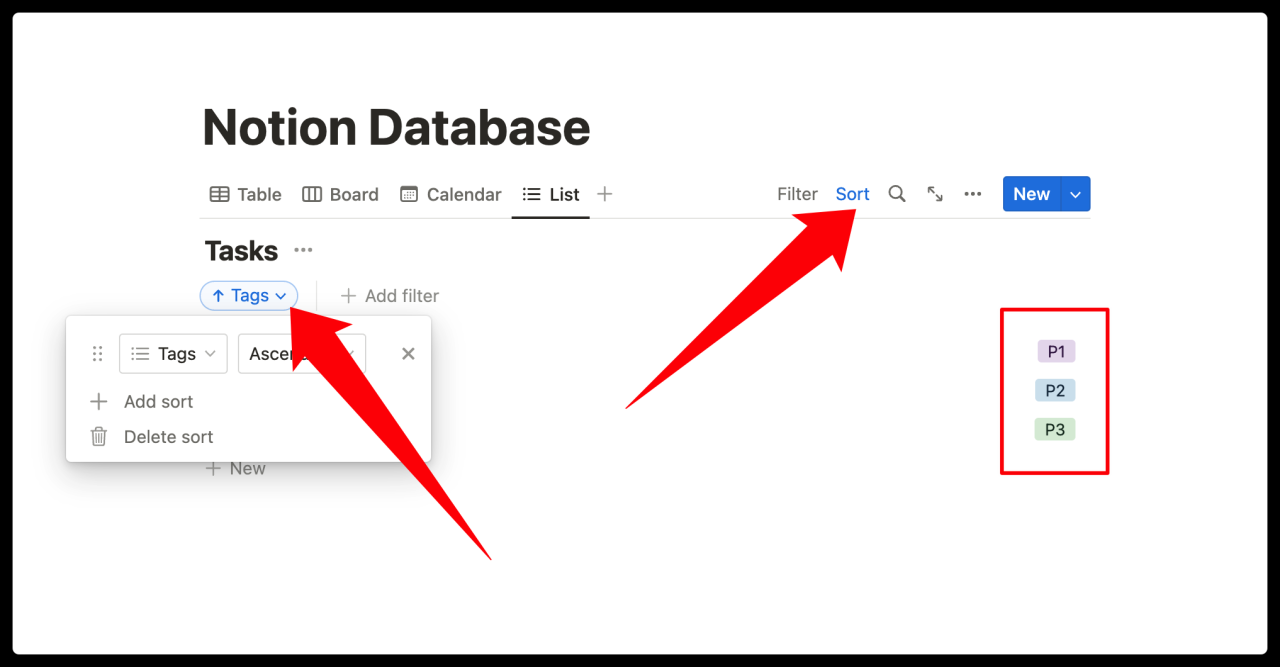
‘Sort’ allows you to rearrange the database based on specific property values. Click on ‘Sort’ in the top right corner of the table, then click on ‘+ Add a Sort’. Choose any property you want to sort by.
For example, you can choose the ‘Due Dates’ property and select ‘Ascending’, so your tasks will be sorted by due date from earliest to latest. Sorting can help you rearrange tasks based on priority, date, tags, etc.
Like filters, you can add multiple sorts and turn them off at any time in the same menu. Of course, you can also create views based on different sorting methods.
Now that you can create different types of pages, let’s continue learning how to search and rearrange these pages in your workspace.